
This guide contains affiliate links. If you buy through them, we may earn a commission at no extra cost to you. Learn more.
A dull knife is not just annoying. It slips off tomatoes and onion skins instead of cutting into them, which makes it more dangerous than a sharp one. The good news: keeping knives sharp at home is easy once you pick the right type of sharpener for how you cook.
This guide explains the main sharpener types, their trade-offs, and exactly what to check before buying.
Quick answer
- Easiest for beginners: a manual pull-through sharpener with two or three stages.
- Fastest for busy kitchens: an electric sharpener with guided slots.
- Best edge and most control: a whetstone (needs practice).
- For weekly maintenance: a honing rod, used between sharpenings.
Sharpening vs honing: know the difference
Sharpening removes a small amount of metal to create a new edge. Honing only straightens an edge that has bent out of line during use. A honing rod keeps a sharp knife cutting well for longer, but it cannot fix a truly dull blade. Most home cooks need both: a sharpener every few months and a honing rod every week or two.
The four main types of knife sharpeners
1. Manual pull-through sharpeners
You place the sharpener on the counter and pull the blade through a slot a few times. Most have a coarse stage (for dull knives) and a fine stage (for polishing).
- Pros: affordable, compact, almost no learning curve, no power needed.
- Cons: fixed angle, removes more metal than a whetstone, not ideal for expensive or Japanese knives.
- Best for: beginners and everyday Western-style knives.

2. Electric knife sharpeners
A motor spins abrasive wheels while angle guides hold the blade in place. They sharpen quickly and consistently.
- Pros: fast, consistent results, good for many knives.
- Cons: larger, louder and more expensive; aggressive coarse stages can wear knives faster if overused.
- Best for: busy households and people who sharpen several knives at once.

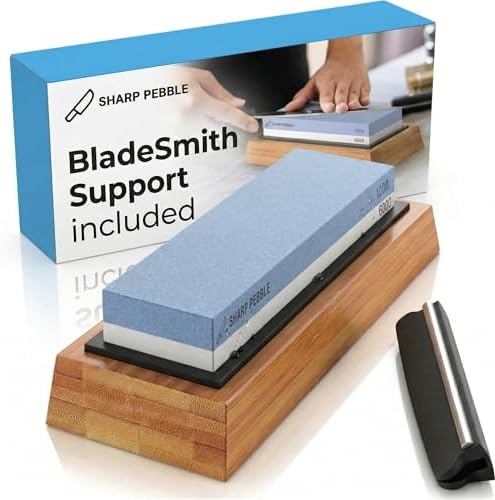
3. Whetstones (sharpening stones)
Rectangular stones, usually soaked in water or used with a little oil, rated by grit. Lower grit (around 1000) sharpens; higher grit (3000–6000+) refines and polishes.
- Pros: best possible edge, works on almost any knife, removes minimal metal.
- Cons: takes practice to hold a steady angle; slower.
- Best for: enthusiasts and owners of quality or Japanese knives.
4. Honing rods (honing steels)
Steel or ceramic rods used to realign the edge. Ceramic rods also remove a tiny bit of metal, giving light sharpening.
- Pros: quick, keeps edges working between sharpenings.
- Cons: cannot restore a dull or chipped blade.
- Best for: everyone who already owns a decent knife.
Quick comparison
| Type | Skill needed | Speed | Edge quality | Best for |
|---|---|---|---|---|
| Manual pull-through | Very low | Fast | Good | Beginners, budget |
| Electric | Low | Very fast | Good to very good | Busy kitchens |
| Whetstone | Medium to high | Slow | Excellent | Enthusiasts, Japanese knives |
| Honing rod | Low | Very fast | Maintains edge | Weekly upkeep |
What to check before you buy
- Sharpening angle: many Western (German-style) knives use roughly 20° per side, while many Japanese knives use about 15°. A fixed-angle sharpener should match your knives. Check your knife maker’s guidance if unsure.
- Serrated blades: most pull-through and electric sharpeners cannot sharpen serrated knives. Look for a model that specifically supports them if needed.
- Number of stages: two or three stages (coarse, fine, sometimes a polishing stage) give more flexibility than a single slot.
- Stability and safety: a non-slip base and a handle you can hold firmly matter more than extra features.
- Abrasive material: diamond abrasives cut fast; ceramic is finer and gentler. Carbide is common in budget pull-throughs and is aggressive.
- Warranty and replaceable parts: some electric models offer replacement wheels.
How often should you sharpen?
For a typical home cook, sharpening every 2–4 months is enough if you hone regularly. A simple test: try slicing a sheet of paper or a ripe tomato. If the knife tears instead of slicing cleanly, it is time.
Common mistakes to avoid
- Pressing too hard in a pull-through sharpener (light, even strokes work better).
- Using the coarse stage every time; save it for genuinely dull knives.
- Putting knives in the dishwasher, which dulls and can damage edges.
- Cutting on glass or stone boards; use wood or plastic instead.
The bottom line
If you just want sharp knives with minimal effort, start with a two- or three-stage manual sharpener and a honing rod. If you cook a lot or own high-end knives, a whetstone is worth learning. Whatever you choose, regular honing will make every sharpening last longer.
Want the technique? Read our step-by-step guide: How to Sharpen a Kitchen Knife at Home.